Toocutebeads.com specializes Jewelry Making Kits
-
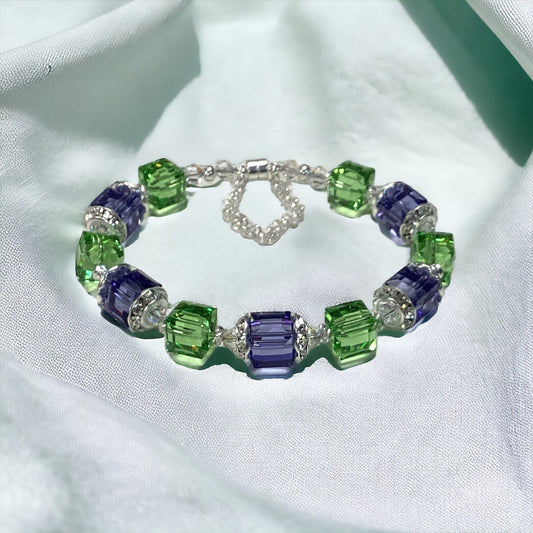
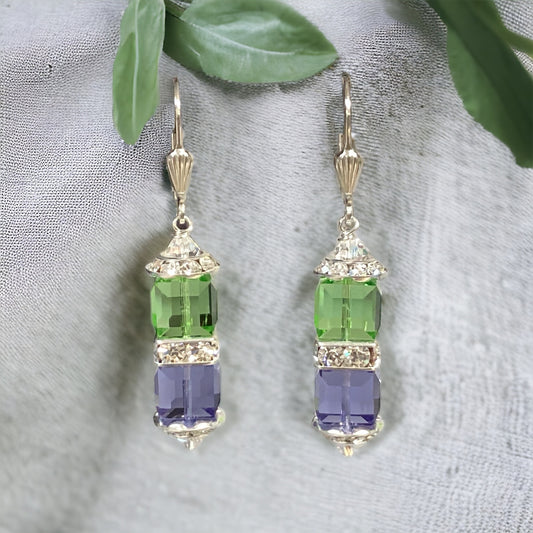
Bracelet Kit - 💫 Peridot and Tanzanite Crystal Bracelet and Earring Kit (Sterling) 💫
Vendor:Too Cute BeadsRegular price $ 41.99 USDRegular priceUnit price per -
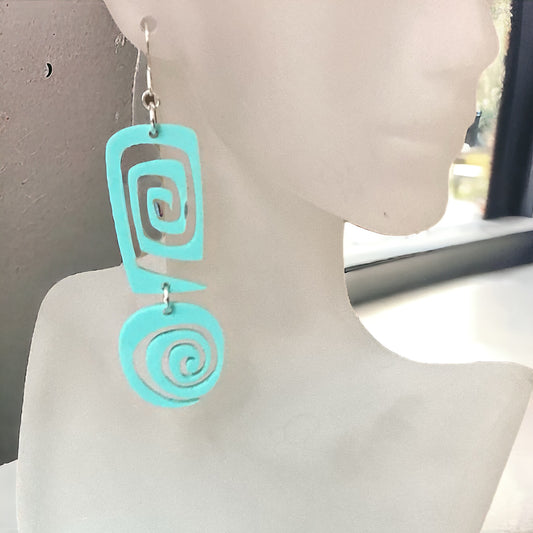
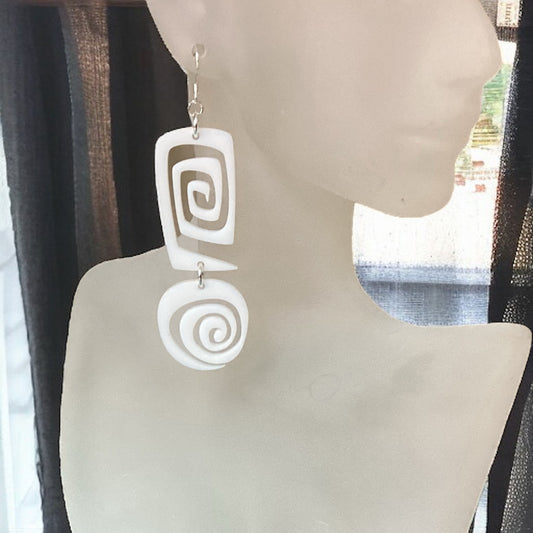
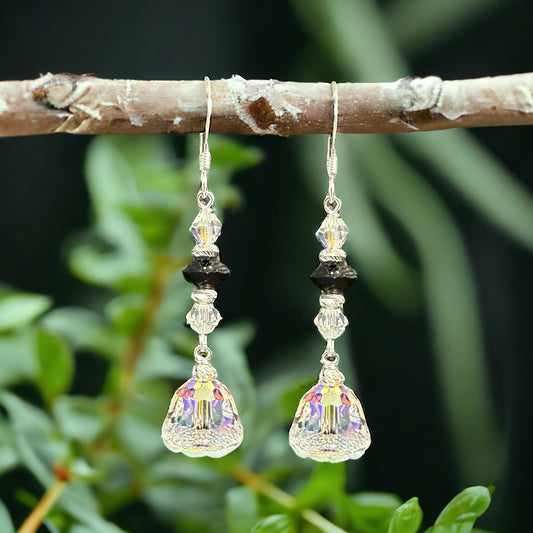
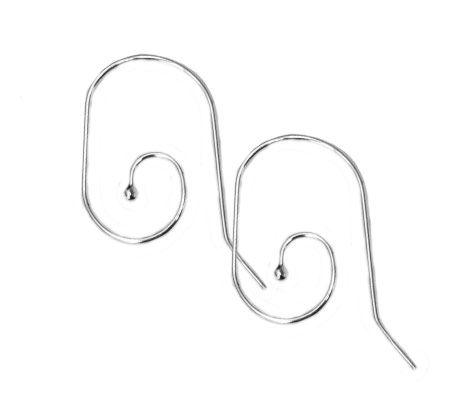
Earring Kit - Summer Swirls Earrings
Vendor:Too Cute BeadsRegular price $ 11.99 USDRegular priceUnit price per -
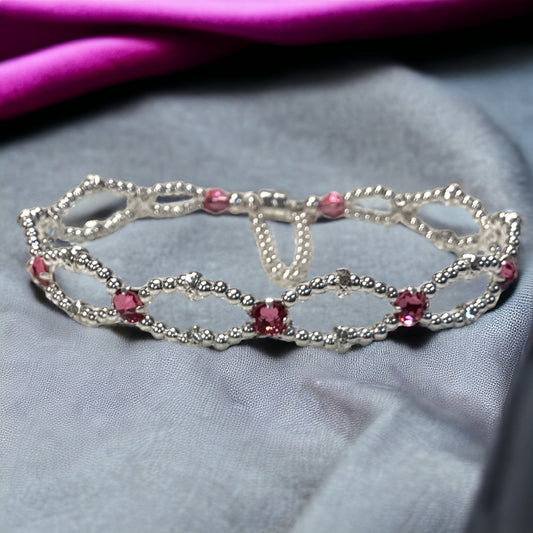
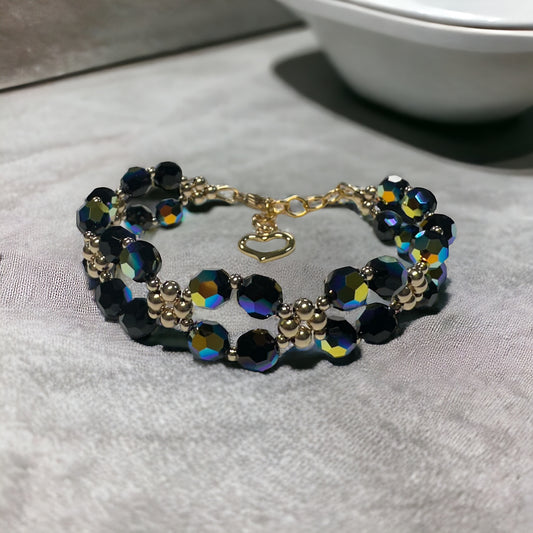
Bracelet Kit - Rose Montee Marquis Bracelet
Vendor:Too Cute BeadsRegular price $ 35.99 USDRegular priceUnit price per -
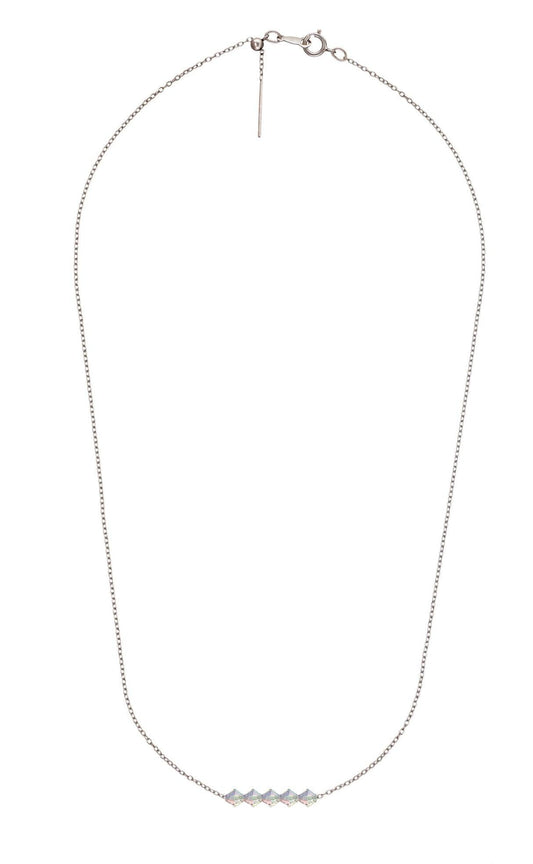
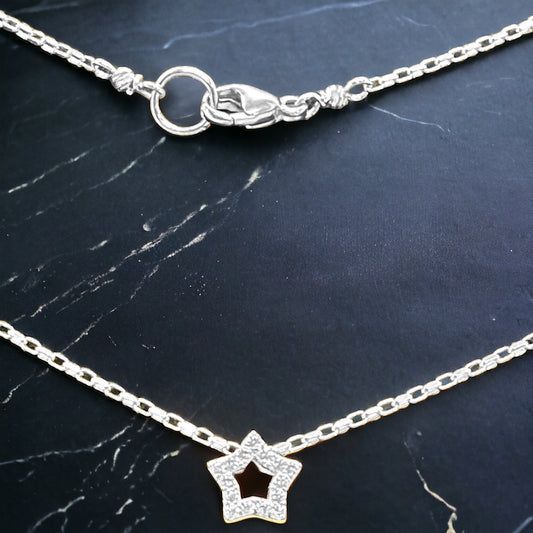
Necklace Kit - Stellar Necklace
Vendor:Too Cute BeadsRegular price $ 25.99 USDRegular priceUnit price per -
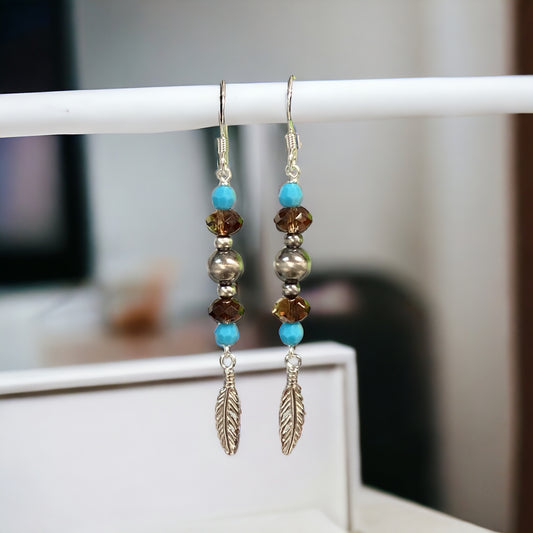
Earring Kit - Fancy Feather Earrings
Vendor:Too Cute BeadsRegular price $ 15.99 USDRegular priceUnit price per -
Bracelet Kit - Crossover Crystal Bracelet
Vendor:Too Cute BeadsRegular price From $ 32.99 USDRegular priceUnit price per -
Earring Kit - Darling Dome earrings
Vendor:Too Cute BeadsRegular price From $ 16.99 USDRegular priceUnit price per -
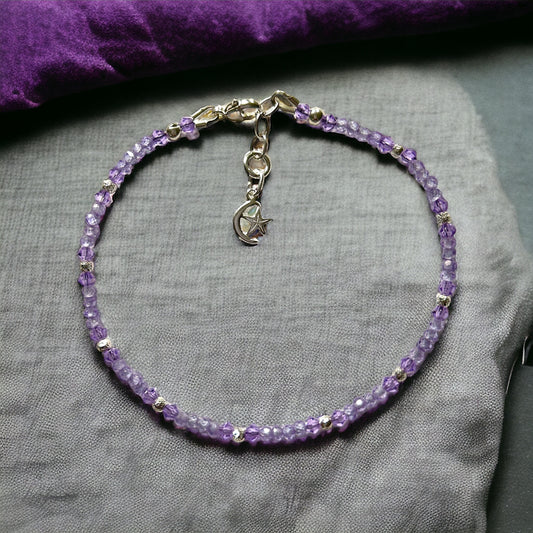
Bracelet Kit - Delicate Celestial Charm Bracelet
Vendor:Too Cute BeadsRegular price From $ 29.99 USDRegular priceUnit price per$ 29.99 USDSale price From $ 29.99 USD

Jewelry Making Essentials
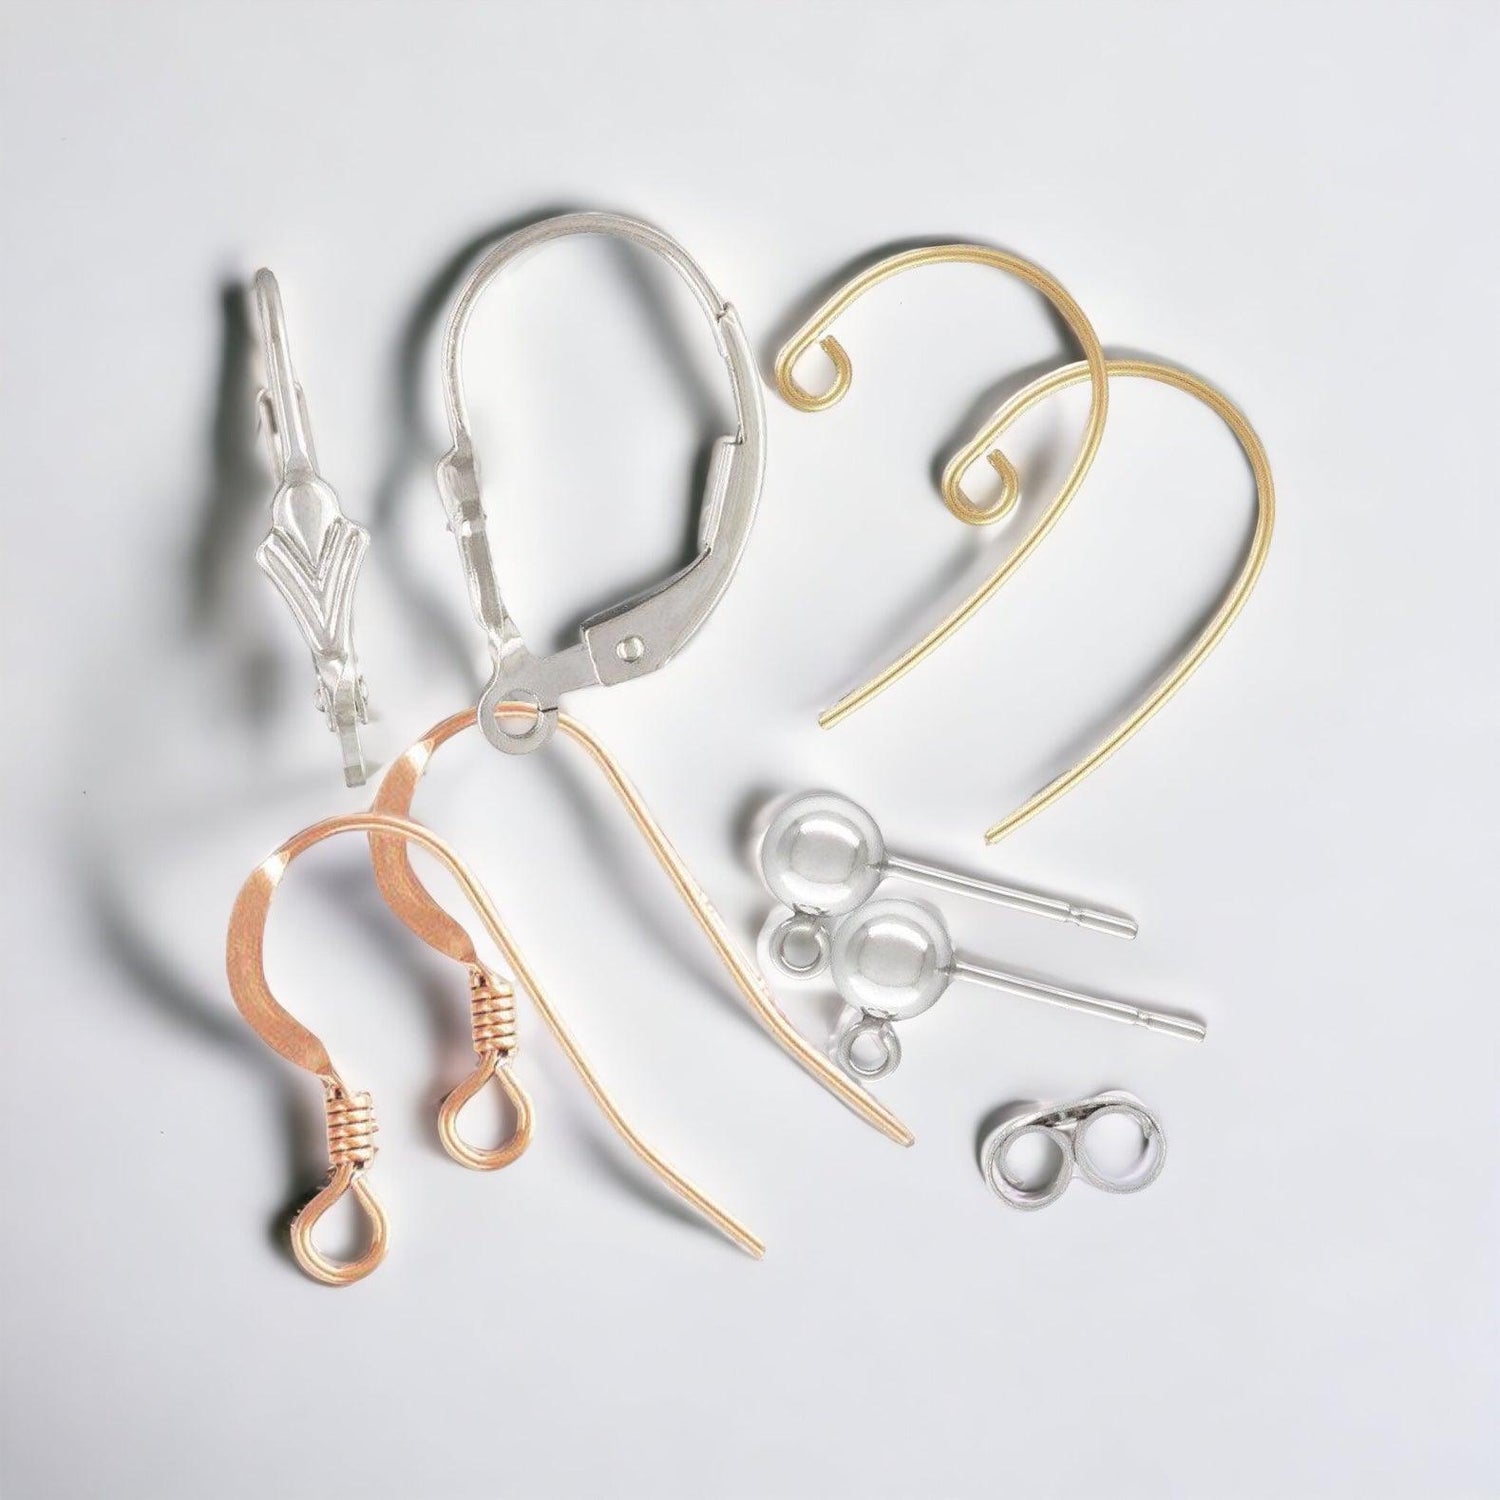
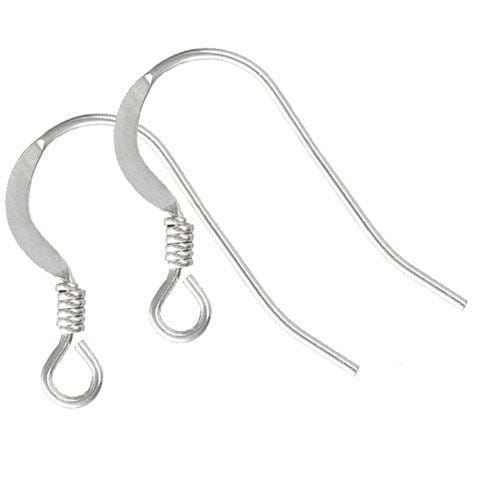
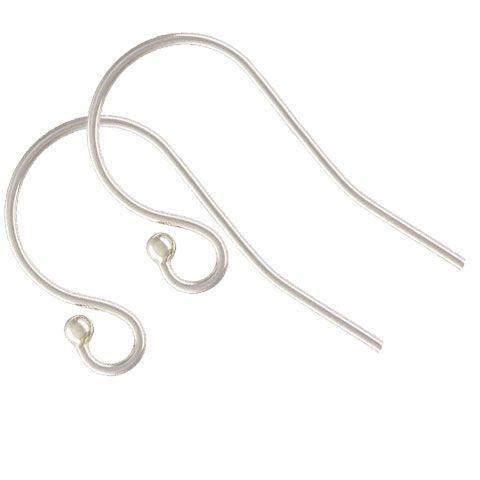
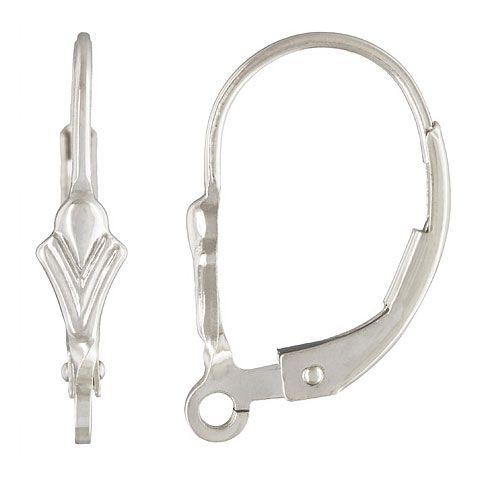
Earring Findings for Jewelry Making
At Too Cute Beads, we understand that the right earring finding can...
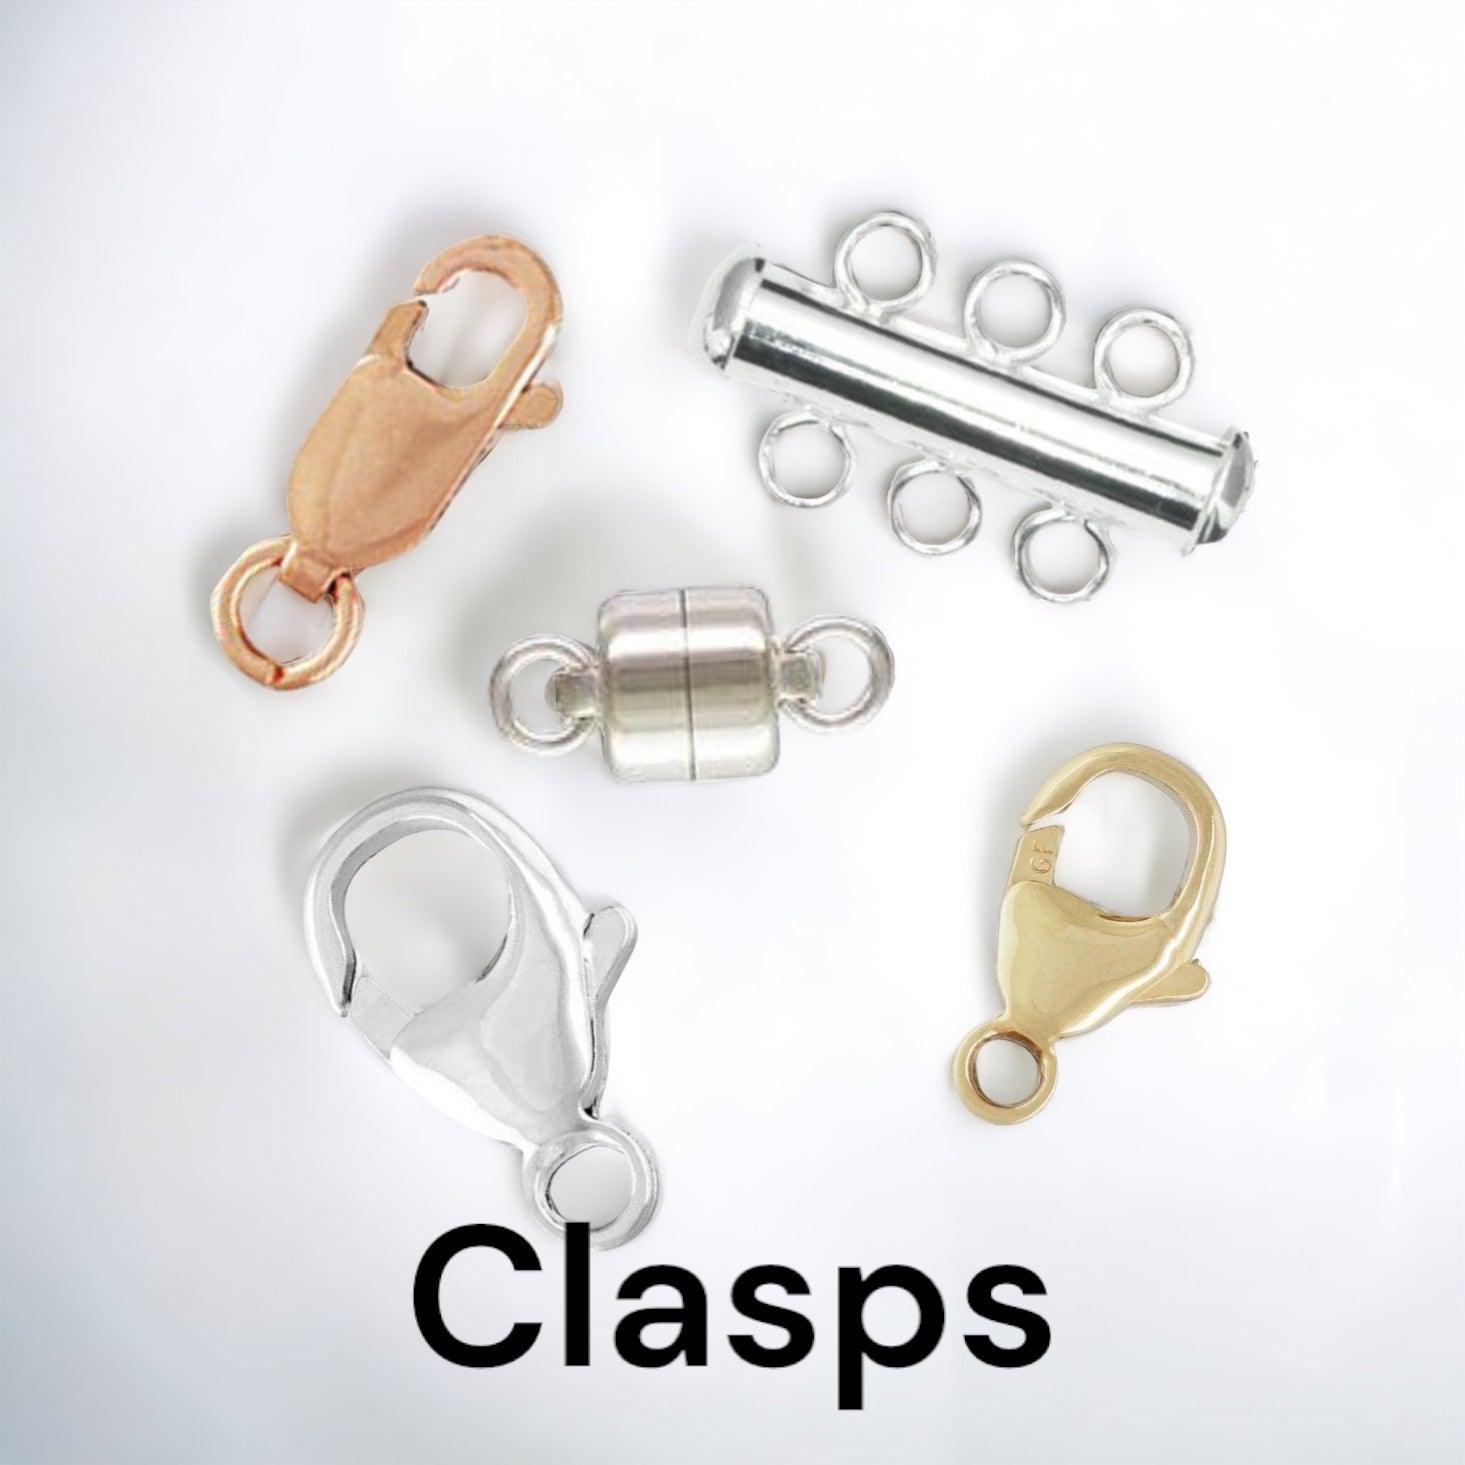
Clasps for Jewelry Making
Welcome to our collection of high-quality jewelry clasps! Whether you're looking for...

Jump Rings for Jewelry Making
Introducing our Jump Ring Collection for Jewelry Making! Our click and lock...
EARRING FINDINGS
-
.925 Sterling Silver Ear Wire - Flat w/ Coil (1 Pair)
Vendor:Too Cute BeadsRegular price $ 1.79 USDRegular priceUnit price per -
.925 Sterling Silver Ball End Ear Wire (1 Pair)
Vendor:Too Cute BeadsRegular price $ 2.49 USDRegular priceUnit price per -
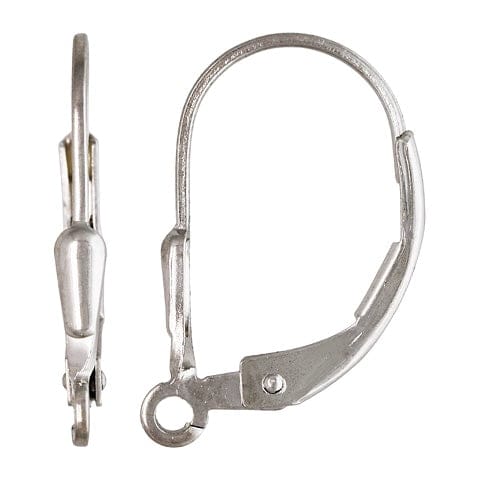
.925 Sterling Silver Fleur De Lis Design Lever Back Earring (1 Pair)
Vendor:Too Cute BeadsRegular price $ 5.09 USDRegular priceUnit price per -
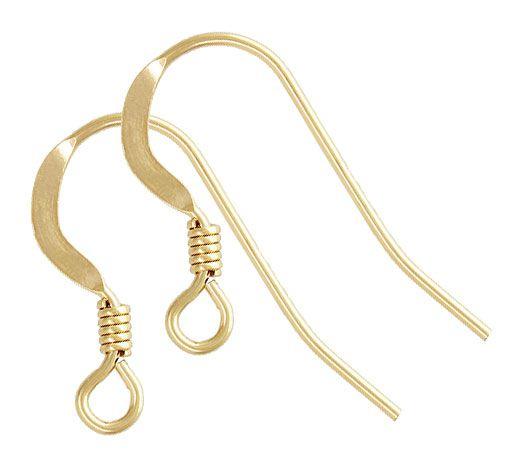
14K Gold Filled Ear Wire - Flat with Coil (1 pair)
Vendor:Too Cute BeadsRegular price $ 2.04 USDRegular priceUnit price per -
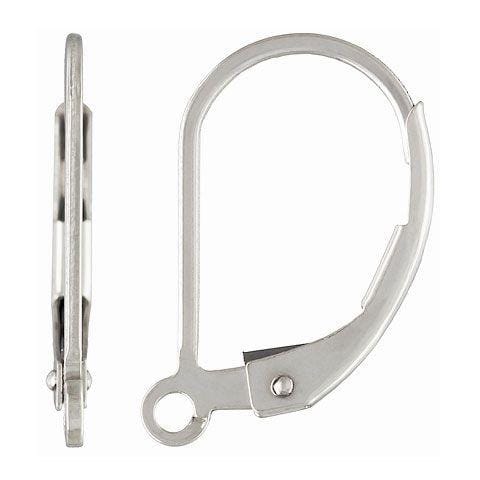
.925 Sterling Silver Lever Back Earring - Plain (1 Pair)
Vendor:Too Cute BeadsRegular price $ 4.39 USDRegular priceUnit price per -
.925 Sterling Silver Interchangeable Ball End Ear Wire (1 Pair)
Vendor:Too Cute BeadsRegular price $ 3.79 USDRegular priceUnit price per -
.925 Sterling Silver Tear Drop Lever Back Earring (1 Pair)
Vendor:Too Cute BeadsRegular price $ 6.19 USDRegular priceUnit price per -
.925 Sterling Silver Sparkle V Shape Ear Wires (1 Pair)
Vendor:Too Cute BeadsRegular price $ 3.19 USDRegular priceUnit price per

Browse our chain for Jewelry Making
-
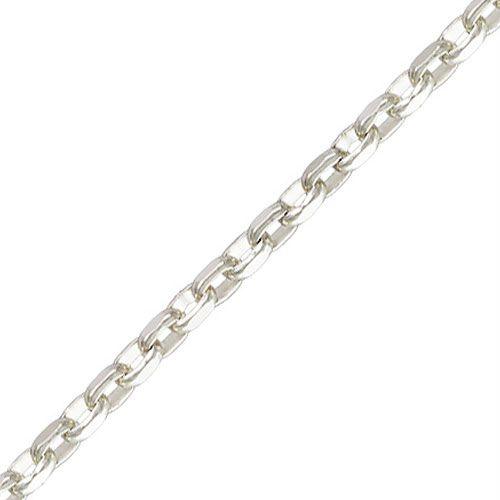
.925 Sterling Silver Diamond Cut Rollo Chain - 1.5mm (1 Foot) #24
Vendor:Too Cute BeadsRegular price $ 10.59 USDRegular priceUnit price per -
.925 Sterling Silver Diamond Cut Rollo Chain - 1.1mm (1 Foot) #6
Vendor:Too Cute BeadsRegular price $ 6.99 USDRegular priceUnit price per -
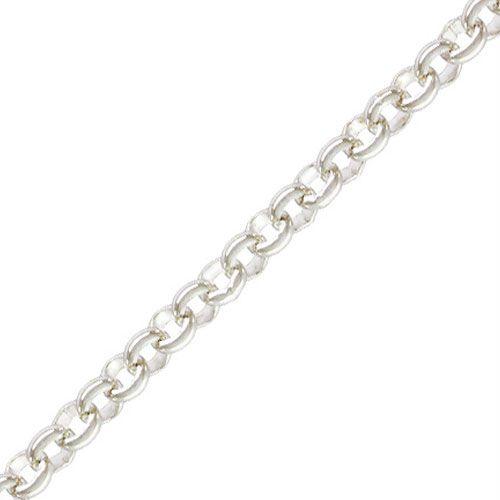
.925 Sterling silver Add-A-Bead Cable Chain Necklace - Adjustable (1 Piece)
Vendor:Too Cute BeadsRegular price $ 20.09 USDRegular priceUnit price per -
.925 Sterling Silver Long Rolo Chain - 2mm (1 Foot) #33
Vendor:Too Cute BeadsRegular price $ 13.59 USDRegular priceUnit price per -
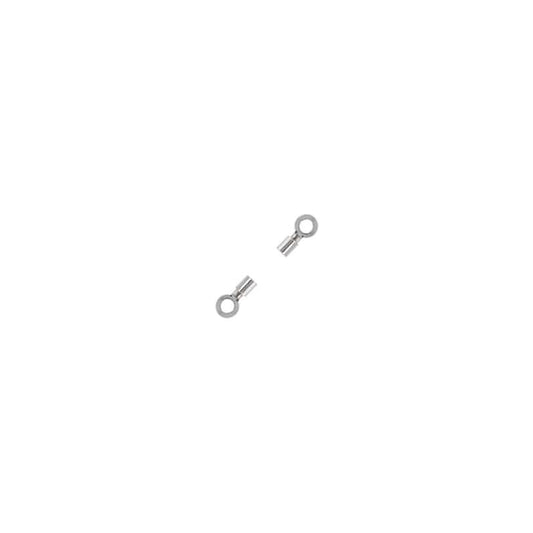
.925 Sterling Silver End Caps for Beading Chain with Ring 1mm opening - (1 Pair)
Vendor:Too Cute BeadsRegular price $ 1.19 USDRegular priceUnit price per -
.925 Sterling Silver Diamond Cut Rollo Chain - 2.5mm (1 Foot) #37
Vendor:Too Cute BeadsRegular price $ 13.99 USDRegular priceUnit price per -
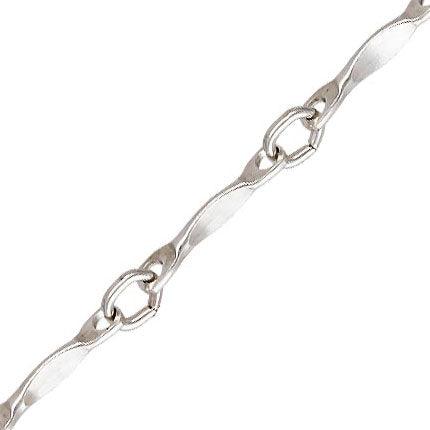
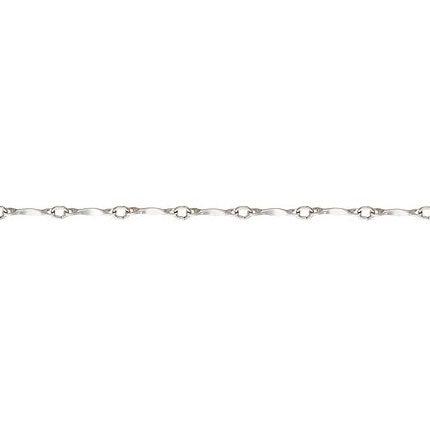
.925 Sterling Silver Dapped Bar Chain - 1.3mm (1 Foot)
Vendor:Too Cute BeadsRegular price $ 11.09 USDRegular priceUnit price per -
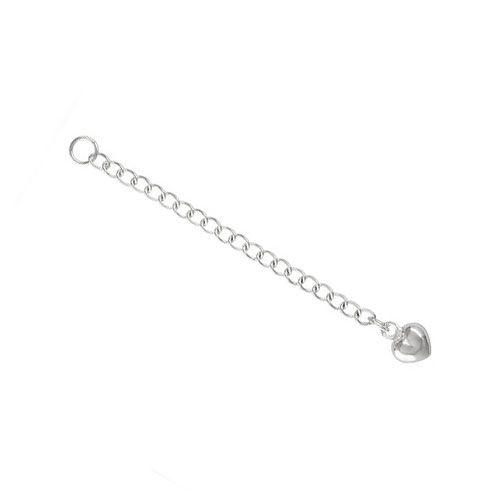
.925 Sterling Silver 2.25in Extender Chain with 6mm Puffed Heart (1 Piece)
Vendor:Too Cute BeadsRegular price $ 5.09 USDRegular priceUnit price per